6/08/2010 05:00:00 PM(Cross-posted on the Webmaster Central Blog)Today, we’re announcing the completion of a new web indexing system called Caffeine. Caffeine provides 50 percent fresher results for web searches than our last index, and it’s the largest collection of web content we’ve offered. Whether it’s a news story, a blog or a forum post, you can now find links to relevant content much sooner after it is published than was possible ever before.
Some background for those of you who don’t build search engines for a living like us: when you search Google, you’re not searching the live web. Instead you’re searching Google’s index of the web which, like the list in the back of a book, helps you pinpoint exactly the information you need. (Here’s a good explanation of how it all works.)
So why did we build a new search indexing system? Content on the web is blossoming. It’s growing not just in size and numbers but with the advent of video, images, news and real-time updates, the average webpage is richer and more complex. In addition, people’s expectations for search are higher than they used to be. Searchers want to find the latest relevant content and publishers expect to be found the instant they publish.
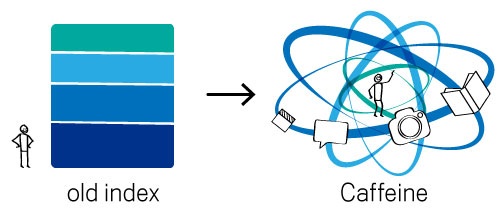
To keep up with the evolution of the web and to meet rising user expectations, we’ve built Caffeine. The image below illustrates how our old indexing system worked compared to Caffeine:
Our old index had several layers, some of which were refreshed at a faster rate than others; the main layer would update every couple of weeks. To refresh a layer of the old index, we would analyze the entire web, which meant there was a significant delay between when we found a page and made it available to you.With Caffeine, we analyze the web in small portions and update our search index on a continuous basis, globally. As we find new pages, or new information on existing pages, we can add these straight to the index. That means you can find fresher information than ever before—no matter when or where it was published.
Caffeine lets us index web pages on an enormous scale. In fact, every second Caffeine processes hundreds of thousands of pages in parallel. If this were a pile of paper it would grow three miles taller every second. Caffeine takes up nearly 100 million gigabytes of storage in one database and adds new information at a rate of hundreds of thousands of gigabytes per day. You would need 625,000 of the largest iPods to store that much information; if these were stacked end-to-end they would go for more than 40 miles.
We’ve built Caffeine with the future in mind. Not only is it fresher, it’s a robust foundation that makes it possible for us to build an even faster and comprehensive search engine that scales with the growth of information online, and delivers even more relevant search results to you. So stay tuned, and look for more improvements in the months to come.
Posted by Carrie Grimes, Software Engineer
AdWords Campaign Experiments: Split Testing tool
We’re excited to announce AdWords Campaign Experiments, or ACE: a tool that will help you optimize your account by letting you accurately test and measure changes to your keywords, bids, ad groups and placements. As part of our ongoing effort to improve your AdWords experience, we’re testing this new tool and inviting U.S. advertisers to participate in the beta.
In the past, the most common way to measure how changes to your account affected your campaign performance was to measure how the campaign performed before and after you implemented your changes. However, this type of analysis can often be complicated by events that occur during the test period, including holidays, weekends, or changes to end user or advertiser behavior.
ACE allows you to perform faster, more accurate tests by executing your experimental campaign alongside your original campaign. By performing this type of simultaneous split test, we can tell you precisely if your campaign changes produce statistically significant results.
Different ways of using ACE
Use ACE to experiment with any combination of bid, keyword, ad group or placement changes. You can test and measure a variety of scenarios including:
- The incremental impact of adding new keywords to your campaign or changing keyword and ad group-level bids
- The value of restructuring your Content campaigns to use more tightly themed ad groups
- The change in volume by using different keyword match types
- The value of using an ad group default bid versus keyword-level bids
- And much more!
Sign up to test the AdWords Campaign Experiments tool
We invite all U.S. advertisers with English as their language preference to participate in the beta of this feature. We may not be able to offer the beta test to all advertisers who apply, so thanks in advance for your patience as we continue to work on the tool. If you’d like to try the ACE beta, please fill out this form.Learn more
For more information, please watch the video below and visit the Help Center for how-to-videos and additional FAQs.
[youtube=http://www.youtube.com/watch?v=MldDeihGwJc]
reference from: http://feedproxy.google.com/~r/blogspot/ATHs/~3/gkDuzxotzDk/adwords-campaign-experiments-beta-split.html
Three ways to control your AdWords costs
Three ways to control your Adwords budget.
1. Daily budget
2. CPC Bids- cost per click.
3. AD Quality
[youtube=http://www.youtube.com/watch?v=KIihfzBiyrA]
Using Page Speed
Firebug FirFox add-on
What is Page Speed?
Page Speed is an open-source Firefox/Firebug Add-on. Webmasters and web developers can use Page Speed to evaluate the performance of their web pages and to get suggestions on how to improve them.
How does Page Speed work?
Page Speed performs several tests on a site’s web server configuration and front-end code. These tests are based on a set of best practices known to enhance web page performance. Webmasters who run Page Speed on their pages get a set of scores for each page, as well as helpful suggestions on how to improve its performance.
Download check here http://code.google.com/intl/zh-TW/speed/page-speed/download.html
Detail info about Page Speed, please check here: http://code.google.com/intl/en/speed/page-speed/index.html
Adwords New Report(Beta)

[youtube=http://www.youtube.com/watch?v=Hip0_I2K2z8]
Campagin – Campagin->Ad Group->Keyword
Day Parts – To find out which a day your campaign is most effective navigate to the DAY Part report.
Destination URL – Show each destination url in your site receives adwords’ traffic
Overview –
What do users search for to access my site?
Which placements drive high engagement visits?
How to use DomainKeys Signature
DomainKeys is a technology proposal that can bring black and white back to this decision process by giving email providers a mechanism for verifying both the domain of each email sender and the integrity of the messages sent. To learn more detail about DomainKeys, please refer to http://antispam.yahoo.com/domainkeys
DKIM is a similar technology as Domainkeys. To learn more detail about DKIM, please refer to RFC4871.
Now, EmailArchitect Server provides a way to add DomainKeys signature and DKIM signature to outgoing email.
Make key-pair certificate
First of all, we need to generate a certificate which contains public key/private key. We can use MakeCert.exe (.NET Framework Tools) to generate certificate like this:
makecert -pe -n "CN=mydomainkeys" -ss my -sr LocalMachine -a sha1 -sky signature -rThen you can check the certficate like this:
Windows Start Menu->input: MMC press enter. MMC->File Menu->Add/Remove Span-in Add->Choose "Certificates"-> Computer Account->Local Machine->Finish->Close. Then you should find the certificate at "Certificates(Local Computer)->Personal->Certificates"You can also use this online tool to generate the certificate
http://mail.adminsystem.com/getpfx/getpfx.aspxCreate X-DK-File
To sign the DomainKeys with EmailArchitect Server, we need to create a text file with notepad. and save it.
For example: We create a adminsystem.com.domainkey.txt and contains the following content. dk_d: adminsystem.com dk_s: s1024 CertStore: machine CertStoreName: my CertSubjectName: mydomainkeys DKIMSupport: yes method: nofws dk_d is the email sender domain, dk_s is the domain public key selector. CertSubjectName is the keyword in certificate subject. If DKIMSupport is "yes", then DKIM signature will be added as well. If method is "simple", then Domainkeys/DKIM signature uses "simple" algorithm; If method is "nofws", then Domainkeys/DKIM signature uses "nofws/relaxed" algorithm;You can also export the certificate with MMC. If importing private key is chosen, the *.pfx will be generated.
then the adminsystem.com.domainkey.txt should contain the following content dk_d: adminsystem.com dk_s: s1024 PFXPath: c:\my cert\adminsystem.pfx PFXPassword: mypassword DKIMSupport: yes method: simple dk_d is the email sender domain, dk_s is the domain public key selector. PFXPath is the PFX file full path. PFXPassword is the PFX file password. If DKIMSupport is "yes", then DKIM signature will be added as well. If method is "simple", then Domainkeys/DKIM signature uses "simple" algorithm; If method is "nofws", then Domainkeys/DKIM signature uses "nofws/relaxed" algorithm;Finally, we just need to copy this file to EmailArchitect Server installation path\domainkeys folder. EmailArchitect Server will generate the DomainKeys signature and DKIM signature for email from domain “adminsystem.com” automatically. The file name syntax must be “[domain name].domainkey.txt”.
Deploy Public Key
We also need to deploy the certificate Public Key to your domain DNS server. You can use the online tool http://emailarchitect.com/live/getpublickey.aspx to export the Public Key of your certificate.
Once you get the public key, you should set a TXT record in your domain DNS server. For example: your selector is s1024, your domain is adminsystem.com, then you should create a TXT record for s1024._domainkey.adminsystem.com and set the following content in the record.
s1024._domainkey.adminsystem.com text = "t=y; k=rsa; p=MIGfMA0GCSqGSIb3DQEBAQUAA4GNADCBiQKBgQCmKsozkVJqlNAGsvn1LoJPmoZl8nizv6pIuOV5P 44E8C6Vbl4DW8p0Bb5Zg8EgpYRgsEiJX5pYDj67YzzXNIhViziHwQ3jbUedxNkw/6GV4ZX8aRJKJnwnYqGWIQ8tQESwQtywfduQ2 TjsS1aG3XeOgxxEeuhBNaZHQWVThSinuQIDAQAB"To learn more detail about Public Key deployment, please refer to http://antispam.yahoo.com/domainkeys
Test DomainKeys and DKIM
You just need to send an email to check-auth@verifier.port25.com, then a report will be send back to your sender email address.
reference from: http://www.emailarchitect.net/emailserver/doc/html/domainkeys.htm
Remarketing – Target your ads to specific audiences
What is remarketing and why should I use it?
Remarketing is a feature of interest-based advertising available in the Audiences tab. Remarketing allows you to reach people who previously visited your website, and match the right people with the right message. You can show users these messages as they browse sites across the Google Content Network.
Let’s say you are an online retailer who sells printers and TVs. You can show TV ads to those people who visited the TV section, and you can cross-sell, up-sell, and promote other relevant products: surround sound systems or DVD players, for example.
Here’s how it works: You add a piece of code (remarketing tag) to pages of your site that correspond to certain categories you want to promote. For example, adding a tag for “TV” on all of the pages where you sell TVs will let you later show relevant TV ads to everyone who visits those pages. Learn more about creating remarketing lists.
Who should use remarketing?
Remarketing is a tool that can drive ROI for all types of advertisers, regardless of the focus of your campaigns (brand-oriented, performance-driven, etc.) or your ad formats.
Search advertisers can use remarketing to create an integrated campaign strategy. After driving traffic to your site with search ads, you can then remarket to those users who reach your site by showing them tailored ads on sites throughout the Google Content Network.
When you combine your keyword campaigns with remarketing, you might see higher conversions for your campaigns overall. For example, if you have keywords that you don’t use because you haven’t seen conversions in the past, you can use these keywords to drive traffic to your site, and then remarket to the user to drive the conversion.
Whether you’re looking to drive sales activity on your site, increase registrations, or promote awareness of your brand, remarketing can be a strategic component of every campaign. Learn more about remarketing.
Watch a video about remarketing[youtube=http://www.youtube.com/v/ZmusXoLqXbk]
How do I create a remarketing list?
You can create a remarketing list from within your campaign or ad group, or you can create it independently, and then select your ad group. Click the appropriate link to find instructions, and then follow the steps below.
Create your list from your campaign or ad group
- Click the Campaigns main tab, then the Audiences tab.
- Click the Add audiences button.
- Select the ad group to which you want to apply the audience (if you don’t want to do this now, you’ll be prompted before saving the list):
- If you navigated to the Audiences tab from the campaign level, you can select the ad group from the “Select an ad group” section.
- If you navigated to the Audiences tab from within an ad group, that ad group gets selected for the remarketing list.
- In the “Add audiences” section, click the remarketing lists link. Any previously-created remarketing lists are displayed.
- Click the Create and manage lists link at the bottom of the list of audiences. The Audience settings tab opens.
Create your list independently from your campaign or ad group
- Click the Control Panel & Library link in the left navigation bar.
- Click the Audiences link.
Then follow these steps:
- Click the New audience drop-down and select Remarketing list. The “New remarketing list” panel opens.
- Enter a descriptive Remarketing list name, optional Description, and Membership duration (the default is 30 days).
- In the Tags section, select the Create new remarketing tag radio button if you want to create a new tag. You can also use an existing tag.
- Click Save and continue.
- Click Save. If you haven’t selected an ad group yet, you’ll be prompted to do so now.
- Copy the tag code and paste it into applicable pages of your site.
Note: you can create as many lists as you’d like.
Learn how to check the number of users on your list.
How do I copy the tag code from a remarketing list?
After you create a remarketing list, click the link in the Tags / Rules column to copy the code. If you want to copy the tag code later, follow these steps to access the table that includes the tag link:
- Click the Campaigns main tab, and then the Audiences tab.
- Click the More actions drop-down, and select Audiences.
- In the Tags / Rules column, click the link of the appropriate remarketing or combination list. The “Remarketing code” window opens.
- From the Page security level drop-down menu, select HTTP or HTTPS, depending on the security level of your conversion confirmation page. The selection affects the tag code snippet.
- Copy the code and paste it into applicable pages on your site, between the <body> tags, closer to the </body> tag. For more information on how to paste the code, check the AdWords Conversion Tracking Setup Guide, which includes a section on how to add a tag to a website.
- Click Done to close the “Remarketing code” window.
Reference from: https://adwords.google.com/support/aw/bin/answer.py?hl=en&utm_medium=uiannouncement&utm_campaign=remarketing&utm_source=adwordsfe&answer=173945
Outlook can’t display images
Solution:
1. Exit out of Outlook 2003 on the machine with the issue.
2. Open the registry (Start->Run->type cmd->click Ok)
3. Navigate and open the following registry key HKEY_CURRENT_USER\Software\Microsoft\Office\11.0\Outlook\Security\OutlookSecureTempFolder
4. Within the key…it should say something like %USERPROFILE%\Local Settings\Temporary Internet Files\OLK3D\
5. Highlight and delete %USERPROFILE%\Local Settings\Temporary Internet Files\OLK3D\
6. Close out of the registry and open Outlook 2003!
7. Now the problem shall be fixed and show your picture on email.
Google Search: Wonder Wheel
New best practices to find more customers on the Google Content Network
Monday, March 29, 2010 | 11:10 AM
Labels: Content Network, New features, Tips
Our previous post in the Content Network Optimization University series covered the basics of setting up and launching a good campaign on the Content Network.
Today, we’ll cover more advanced optimization strategies. We’ve compiled these by observing best practices from the most successful advertisers on the network. Whether you’re new to the Content Network or have been using it for a while, you can get better results from your campaigns by employing some of these strategies.
Build effective campaigns
Taking time up front to set up your campaign correctly goes a long way in getting higher quality traffic to your site. Let’s recap the top strategies:
- Separate Search and Content Network campaigns: Setting up a separate campaign just for the Content Network will give you more control over daily budgets, ad groups, keywords and bids. Watch this demo on campaign setup.
- Create many, tightly themed ad groups: AdWords can target your ads more precisely if you build multiple ad groups, each with a small tightly-themed set of 5 to 20 keywords. Watch this demo on ad group setup and this demo on keyword selection.
- Copy your best performing text ads from Search campaigns: For initial setup, it’s best to use the text ads with the highest click-through rates from your search campaigns. Watch this demo on ad text best practices.
- Setup the same starting CPC bid as your Search campaigns: We recommend starting with the same maximum CPC bid as your Search campaign ad groups. Once AdWords has collected enough data, our smart pricing technology will automatically optimize your bids on the Content Network to give you more profitable clicks. Watch this demo on bidding tactics.
- Set up AdWords Conversion Tracking on your website: Install Conversion Tracking on your website to measure the sales and leads (conversions) you get from each ad group and placement. Watch this demo to learn how conversion tracking works on the Content Network.
Optimize for better results
It’s important to monitor your campaign’s performance and consistently optimize individual elements. Before making significant changes (e.g. changing bids, excluding high volume sites, pausing ad groups), wait until enough click or conversion data has accrued. We recommend having at least 5 conversions or 100 clicks per site.
- Exclude poor-performing sites: Get more qualified traffic and boost conversions by excluding sites that perform poorly for your campaign, based on the number of clicks, the average CPC and the number of conversions.
- Focus your keywords and exclude less relevant keywords: Add more keywords that describe your product and ad group theme in greater detail. Also, add negative keywords to refine your targeting and prevent impressions on irrelevant sites. Watch this demo on refining your campaigns.
- Adjust your bids to manage your costs: Change your bids for ad groups or individual sites based on conversion rate, average CPC and cost-per-acquisition (CPA) to meet your performance goals. You should bid higher for better performing sites to get more traffic, and lower for poorly performing sites.
- Use Conversion Optimizer to manage your CPA: Google Conversion Optimizer is a free tool that automatically manages bids at the site level to reach a maximum CPA bid, which is the amount you’re willing to pay for a conversion (such as a purchase or sign-up). Watch this video on how to use Conversion Optimizer.
Expand your campaign for more traffic
To get additional traffic and boost sales from your campaign, we recommend creating a keyword expansion strategy for the Content Network.
- Use the Wonder Wheel tool for ad group ideas: You can use Wonder Wheel on Google Search to brainstorm new ad group themes and keyword ideas. When you search for any topic on Google.com, Wonder Wheel will generate up to eight related topics for you to consider.
- Create new ad groups to reach additional parts of the network: Each topic in Wonder Wheel represents a possible ad group theme for your campaign. Simply click on any of the topics to see other searches and themes related to it. Any closely related topics that are less relevant to your product are great candidates for your negative keyword list. Watch this demo to learn how to use this strategy.
- Expand your keyword list to get more traffic: Once you have finalized your ad group themes, use the AdWords Keyword Tool to get keyword ideas. Enter ad group theme descriptions or keywords under the ‘Descriptive words or phrases’ tab. Select the 5 to 10 most frequently searched keywords and save them to your ad group This will help to ensure that your list stays highly relevant to your ad group theme.
You can find all the latest videos and updates on our YouTube channel. We hope these tips help you get even better results from your Content network campaigns!Posted by Katrina Kurnit, Inside AdWords crew


